The SITE PLAN tool helps organisers to create a site plan of the event, which can then be attached to the corresponding permit applications. This allows all relevant spatial parameters of an event at the selected location (such as stage, water and toilets, electricity, escape routes, fire extinguishers, bar/catering etc.) to be marked and displayed to support the review of the application by local authorities. The plan module has three functions for creating the site plan.
1. Drawing Window
In the middle of the screen is the drawing area where you can draw your plan. You can select either the street map or a satellite image as the background map and draw the elements of your event on it. As with the map tool, you can zoom in and out of the window to adjust the scale so that you can easily draw in all the elements of your event.
2. Toolbox
On the left side of the window is a grid with icons for different tools that you can use to draw your plan. You can draw polygons, circles and rectangles to represent areas for the stage, stalls, dance floor, seating areas and the like. With the modifying tools at the bottom of the grid, you can change, scale and move areas.
There are also measuring tools with which you can determine the size or length of elements and areas in the site plan of your planned event and mark important measurements on the plan, as is sometimes required by the administration.
With the two buttons at the top of the grid you can undo or repeat drawing steps.
3. Properties Column
The right column contains information about the drawn objects and their properties, which can be changed. Colour, labelling, text size and other properties can be altered here to make your plan clear and easy to read.
Hotkeys for the Site Plan tool
In order to simplify the workflow when creating the site plan, several keyboard shortcuts (hotkeys) have been programmed into the module. The following hotkeys are currently functional.
| Action | Windows Hotkey | Mac Hotkey |
| Copy | Ctrl + c | Ctrl + c |
| Paste | Ctrl + v | Ctrl + v |
| Redo | Ctrl + y | Ctrl + y |
| Undo | Ctrl + z | Ctrl + z |
| Delete | Delete | Fn + Backspace |
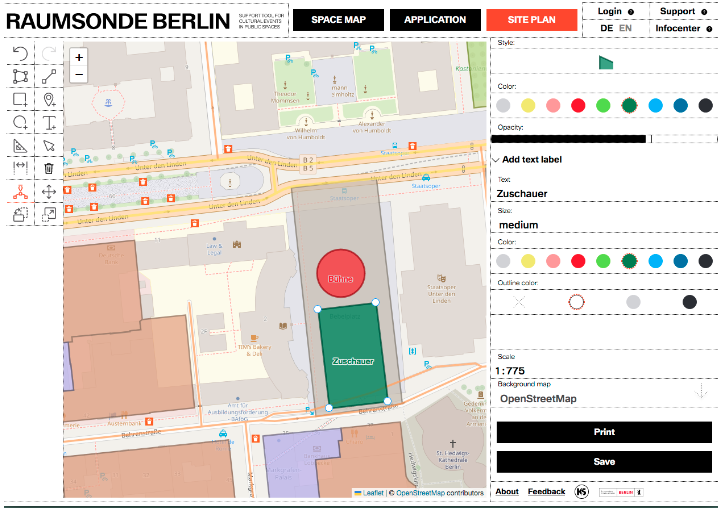
Figure 18: Draw Site Plan
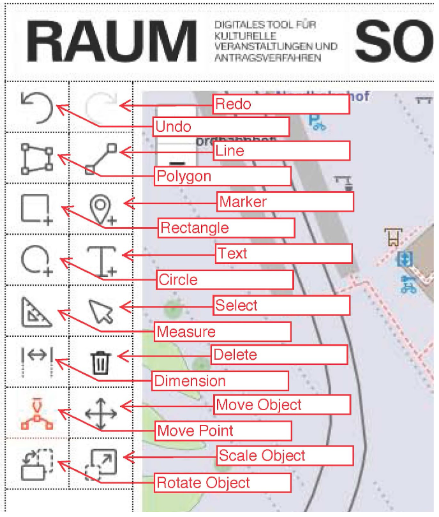
Figure 19: Plan Tool - Toolbox
Save
Just as with the application wizard, it is also possible to save the site plan tool while drawing it and to create different versions in order to mark changes in the course of the event organisation and to react to change requests. However, saving is only possible with an account and when you are logged in. To do this, you must first register as a user in the RAUMSONDE system (see Log-In).
Plans can be saved on your computer or in your RAUMSONDE user account so that plans from older projects can be reused and revised for recurring or similar events.
Print Mode
When you have finished drawing your plan, you can switch to print mode via the button "Activate printing" to create a drawing for your application. In this mode you can also set the scale of the plan. The print preview shows you how much of the map will be visible on an A3 plan at the selected scale, so you can adjust the scale according to the area needed for your event.
In the Information column you can enter the information that should appear in the header of the map. The size of the header and the input fields corresponds to the usual DIN standards, so that your plan's header should contain all the information you need.
The different colours you have used for the different polygons in your drawing appear as legends in the header. In this mode you can label each individual element to create a colour-coded legend for your plan.
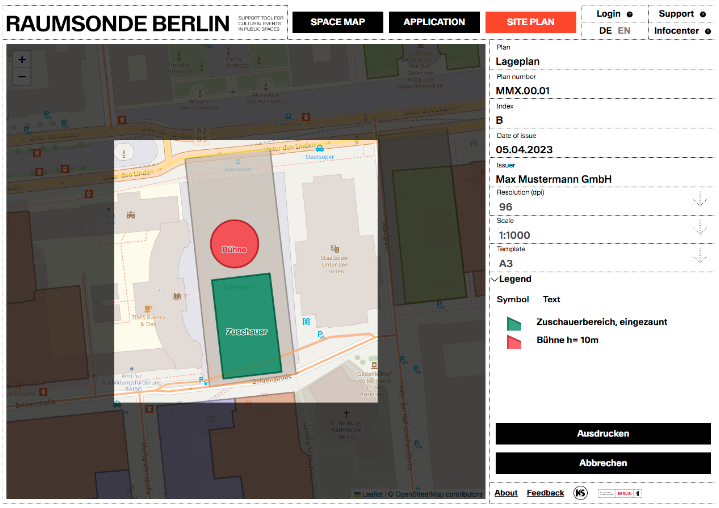
Figure 20: Plan Tool - Print mode
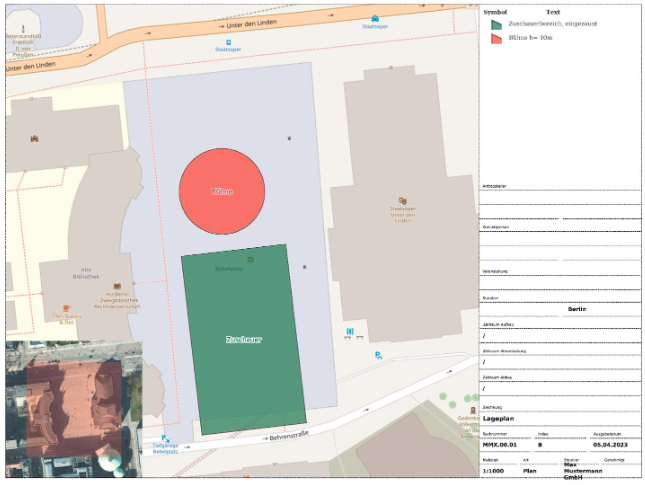
Figure 21: Plan Tool - Example Site plan